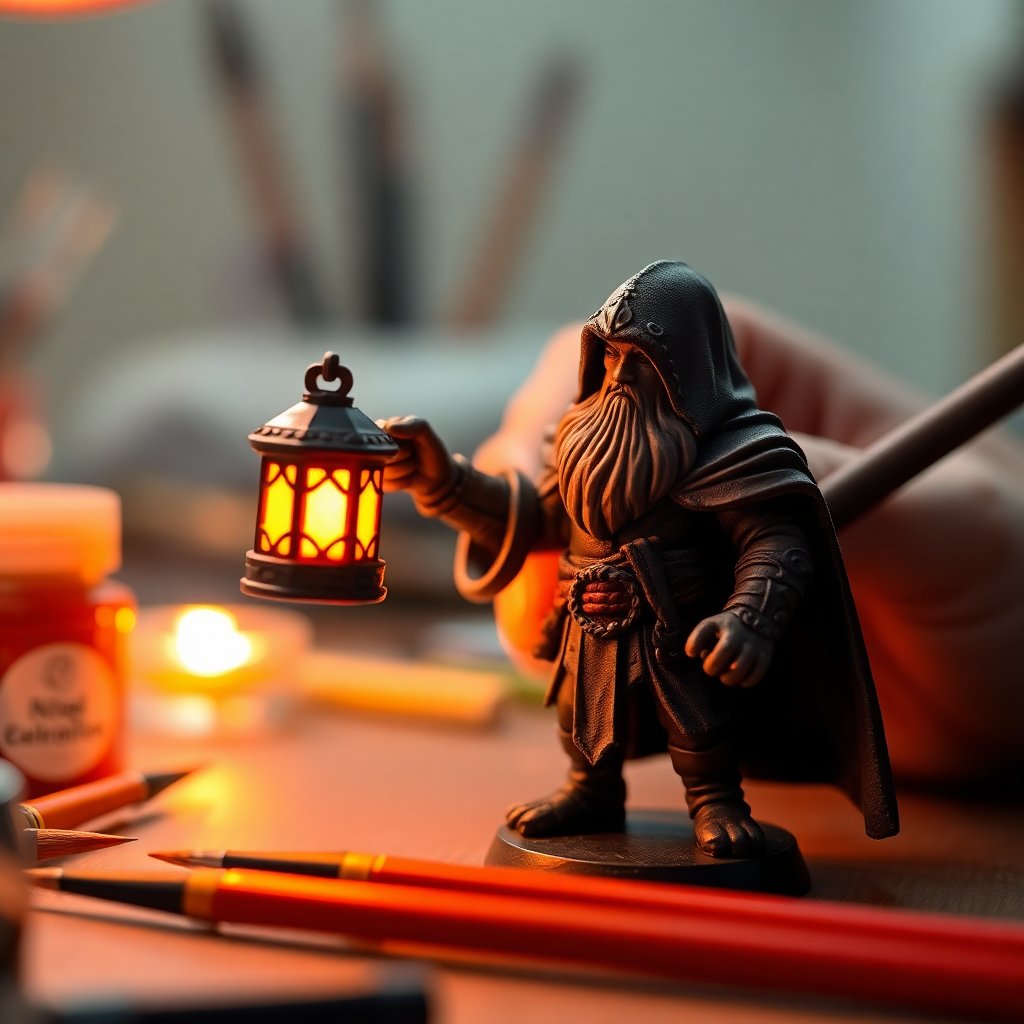
There is a moment every miniature painter remembers: scrolling past a model holding a lantern, and the lantern actually looks lit. The warm light spills over the gloves, catches the underside of the hood, and fades into the cloak. Nothing on the model is glowing, of course. It is all paint. That illusion is object source lighting, usually shortened to OSL, and it is one of the most striking effects you can add to a figure.
It also has a reputation for being hard. It is not as hard as it looks, but it is unforgiving of one thing: not thinking about where the light goes before you pick up a brush. Get the planning right, and the painting is mostly patient glazing. This guide walks through the whole process, from choosing a light source to the final dot of white.
With long autumn evenings and Halloween around the corner, it is a perfect season for lanterns, candles, glowing runes, and spooky eyes.
What OSL Actually Is
OSL is painting the light that an object casts onto everything around it. A regular highlight assumes light comes from above, like the sun or a ceiling lamp. OSL adds a second, local light source on the model itself, such as a torch, a power sword, a magic orb, a screen, or eyes, and paints how that light falls on nearby surfaces.
Two things sell the effect:
- The source itself looks bright, usually a near-white core fading to a saturated color.
- Nearby surfaces pick up that color, strongest where they are closest and facing the source, fading quickly with distance.
That second part is where most of the magic lives. A glowing gem with no light around it reads as "bright paint." The same gem with a soft green wash of light on the fingers holding it reads as "glowing."
Step 1: Plan the Light Before You Paint
Spend five minutes with the bare model and a real light. A small LED penlight or even your phone flashlight held right where the source sits will show you exactly which surfaces catch light and which fall into shadow.
Ask three questions:
- Where is the source? Mark it mentally or with a tiny dot of paint.
- What faces it? Surfaces angled toward the source get the brightest light. Surfaces facing away get none at all.
- How far does it reach? Light falls off fast. Physically it follows the inverse-square law: double the distance, and the intensity drops to about a quarter. On a 32mm miniature, a candle's glow might only travel a centimeter or two before it is gone.
Keep the rest of the model dark-ish. OSL depends on contrast. A glowing lantern on a brightly lit, high-contrast model barely registers. Many painters deliberately paint the surrounding areas a little darker and less saturated than they normally would so the glow has room to shine.
Step 2: Choose Your Colors
You need three things: a near-white core color, a main glow color that is saturated and fairly bright, and a darker transitional tone of the same hue.
Common combinations:
| Light source | Core | Glow | Transition | |---|---|---|---| | Candle, torch, fire | Pale yellow-white | Warm orange-yellow | Orange-red | | Magic, plasma, energy | Very pale blue | Bright cyan or turquoise | Deep blue | | Toxic, warp, necro | Pale yellow-green | Bright lime green | Dark green | | Infernal, laser eyes | Pale pink-white | Bright red | Deep crimson |
Saturated paints help. Fluorescent or "neon" acrylics and highly pigmented inks make glows pop far more than standard paints. A small set of fluorescent colors is worth having if you plan to do a lot of OSL.
→ Shop fluorescent acrylic paints for miniatures on Amazon
Step 3: Paint the Model First, Then Add Light
Paint the model as normal, but stop short of your brightest highlights on any area the light will touch. Full basecoats, shading, and modest highlights are fine. Final edge highlights can wait.
This order matters because OSL is applied as layers of colored light over finished surfaces. If you edge highlight a cloak in pale grey first and then try to glaze orange light over it, you will be fighting the grey.
Step 4: Paint the Source
Start with the object itself.
- Basecoat the source in your transitional color.
- Layer up through the glow color toward the center or the hottest point.
- Finish with the core color in the very center: the wick of the candle, the middle of the orb, the brightest part of the blade.
- Add a tiny dot or line of pure white at the hottest spot.
The source should be the single brightest thing on the model. If anything else is brighter, the eye goes there instead.
Step 5: Glaze the Light Onto Surroundings
This is the core of OSL. You build the glow up slowly with thin glazes.
Thin your glow color heavily, roughly to the consistency of a wash or thinner. Our guide on thinning acrylic paint covers ratios, but for OSL you want paint that tints rather than covers. A glaze medium helps it stay workable.
Then work outward from the source:
- Apply a glaze to every surface within the light's reach that faces the source. Keep it loose.
- Let it dry fully. Repeat on a slightly smaller area.
- Repeat again on a smaller area still, closer to the source.
After four to eight glazes, you will have a smooth gradient from strong color near the source to nothing at the edge. Patience here is everything. Thick, impatient layers leave hard rings that ruin the illusion.
Brush choice matters. A good point and a belly that holds a little fluid make glazing far easier. A size 1 or 2 round with a reliable tip is ideal, and a slightly worn brush is useful for the softest outer fades. See our roundup of brushes for glazing if your current brush keeps leaving tide marks.
→ Shop size 1 and 2 round miniature brushes on Amazon
Step 6: Add the Bright Reflections
Once the glow gradient is smooth, go back in with your glow color, then a mix of glow and core, and pick out edges and raised areas that face the source directly.
This is essentially edge highlighting, but only on the lit side and in the light's color. The same hand control from our edge highlighting guide applies, just aimed toward the light instead of up toward the sky.
Closest edges get the brightest highlight. Fingers wrapped around a lantern handle might get a nearly white-yellow edge. A shoulder pad further away might get a single thin line of orange.
Step 7: Check Your Shadows
Light from a local source casts shadows away from that source. If a torch is held at waist height, the underside of the chin and the bottom of the hood are lit, while the top of the head is not. That is the opposite of normal top-down lighting, and it is what makes OSL look convincing.
Look at the model from arm's length and squint. If the lit areas form a believable pool of light around the source, you are done. If they look patchy or the light seems to jump to random spots, soften or remove the outliers.
Common OSL Mistakes and Fixes
The glow is a uniform halo. Light does not paint a perfect circle on everything. Surfaces facing away from the source should stay dark even if they are close. Fix it by repainting shadowed planes in their original colors.
Hard rings in the gradient. Your glazes were too thick. Glaze the base color of the surface back over the ring to soften it, then rebuild with thinner layers.
The light is too big. Small sources cast small glows. A candle lighting up the whole model looks wrong. Pull the effect in tighter around the source.
The source is not the brightest point. Add more core color and white to the source, or knock back highlights elsewhere.
It looks chalky. Too much white in your glow mixes. Use saturated colors and reserve white for the very center of the source.
Gear That Makes OSL Easier
- A daylight lamp so you can judge subtle color shifts accurately
- A wet palette to keep glazes workable during long sessions
- Glaze medium for smooth, translucent layers
- Fluorescent paints or inks for intense, saturated glows
→ Shop wet palettes for miniature painting on Amazon
Airbrushes can lay down OSL gradients quickly, and many advanced painters rough in glows that way before refining with a brush. You do not need one, though. Everything above can be done entirely with a brush.
A Simple First Project
If you have never tried OSL, start small: a single model holding a candle or lantern, or a pair of glowing eyes on a helmet. Pick warm fire colors, which are the most forgiving, and limit the light to the hands and the front of the torso. You will learn more from one finished small OSL than from an ambitious one abandoned halfway.
Once that works, move to larger sources like power weapons and magic orbs, then try multiple light sources on a single model, which is where OSL gets genuinely tricky.
The Bottom Line
OSL is planning, contrast, and patience. Decide exactly where the light lives, keep the surroundings a little darker, build the glow with thin glazes, and finish with crisp reflections facing the source. Do that, and a few drops of paint will look like the model is carrying its own light.
Affiliate disclosure: some links above are Amazon affiliate links, and purchases made through them may earn this site a small commission at no extra cost to you. Recommendations are based on technique needs, not commissions.
As an Amazon Associate we earn from qualifying purchases. This article contains affiliate links; if you buy through them we may earn a small commission at no additional cost to you.